Paint.net
You can do these assignments from home on a computer if you download and install Paint.net
- either use this link to download it for free, or
- you can download it from the Microsoft Store for $9
Saving files
To save your file, CTRL+S or File>Save and give it a name. File type should be paint.net (*.pdn)

If it's set as PNG by default... use the drop-down menu and change it to the first one (*.pdn)


When you've saved it, you have to see the name at the top-left of your window as .pdn

Workspace
When you open Paint.net, you have a workspace like this...

In the top right corner you can show/hide the panels...

Menus
The menus are on the top left...

Tools
All the tools are in a panel on the left. If you click on "Tool" you can see the list and select one that way too..


History panel / Undo
You can undo the last action you did using the keyboard shortcut CTRL+Z. If you want to redo, it's CTRL+Y.
You can also use the EDIT menu...

You can go back multiple steps in the history panel. The History panel is on the top right. Here you see a list of previous actions...

Layers
The advantage of Paint.net vs regular MS Paint, is that you can use Layers. To start with it looks like this...

Always insert a new layer before drawing something. That way if you mess up, you can just delete some/all of that without wrecking the rest of what you've drawn.

To delete a layer, use the "x" button at the bottom of the Layers panel...

Duplicate Layer = make a copy of the current/active layer.

Merge Layers lets you combine layers - only do this when you're happy with them - and lets you fill in with colors so you have closed shapes.

Layer properties
If you double-click on the layer name or use this button at the bottom of the Layers panel...... you will get the layer properties window. You can rename the layer, change the blend mode (instead of "Normal") and opacity.


Colors
- Default colors: black & white.
-
- Primary = front/foreground, Pencil/Brush color; outline for Shapes
- Secondary = back/background, fill for Shapes
- Switch colors using the arrow

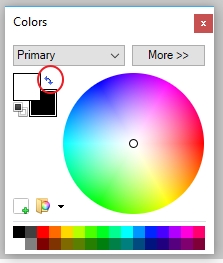
You can choose a color on the color wheel in the middle, or one of the color squares (bottom left)...
If you click on More...you see more options for changing your colors. You can set the color to a specific RGB or hexadecimal number; you can also play with the hue/saturation/value amounts, and the opacity amount on the right...


- Paint Bucket Tool - click inside the area/shape you want to fill on an active layer.
- Gradient Tool - set 2 colors and then choose type of gradient (linear/radial etc); click and drag out
- Color Picker - select a color you've already used, just make sure the layer that color is in is active and showing (not hidden).


Drawing tools


- Pencil - can't change the thickness, only the color, and the type of pencil (smooth/pixelated).
- Brush/Eraser = the default size/width is "2". You can use the "+" and "-" to change the size a bit, or use the drop-down menu. You can also adjust the Hardness by dragging on the amount...

Line/Curve Tool = you get 4 nubs, can adjust any of them. There are 2 types of curves you can draw:
- Cubic Spline (Left option) - move a nub, curve redrawn so goes through center of each control nub
- Bezier Curve (Right option) - curve extends from first nub to the destination nub; curve won't necessarily touch the middle nubs


To commit a line/curve, do any of the following:
- Press the Enter key
- Click outside of the bounding box of the current Line/Curve.
- Click Finish in the Tool Bar
- Draw a new Line/Curve.
Shapes
To draw with shapes, first click on the Shapes tool, then go up to the tool options bar and choose which shape you want to draw with...

You can change what is drawn. Outline = foreground color; Fill = background color.
- Draw Shape Outline (no fill)
- Draw Filled Shape (no outline)
- Draw Filled Shape with Outline
Brush width = thickness of the outline.

Selecting tools


- Rectangle/Ellipse Select = click and drag an outline over what you want to select.
- Lasso Select = click and drag around the area you want to select until you're back where you started.
- Magic Wand = selects all pixels same color as where you clicked
You can add to your selection, subtract or intersect using the buttons on the tool options bar...

- Delete will delete what's in the selected area.
- Backspace fills it with whatever the Primary color is.
- CTRL+A will select everything on the active layer.
- CTRL+D will deselect, get rid of the dotted outline.
You can see the shortcuts under the EDIT menu...

Move


- Move Selected Pixels = moves everything on the active layer.
- Move Selection = adjust a selection:
-
- to move the selection outline somewhere
- to adjust the size of the selection using one of the corner/side circles
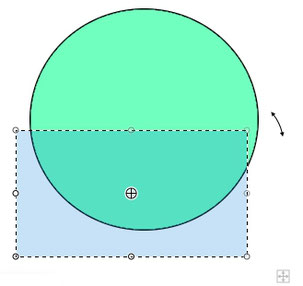
- to rotate the selection by hovering by a corner, then click and drag

